Safety Notice: When creating any DIY items that are intended to be used around or by an infant or child, please do your due diligence and research child safety requirements (choking hazards, poisoning, etc.) to make sure that your projects and all components are safe to use. Our projects are intended for inspiration only.
Project Intro
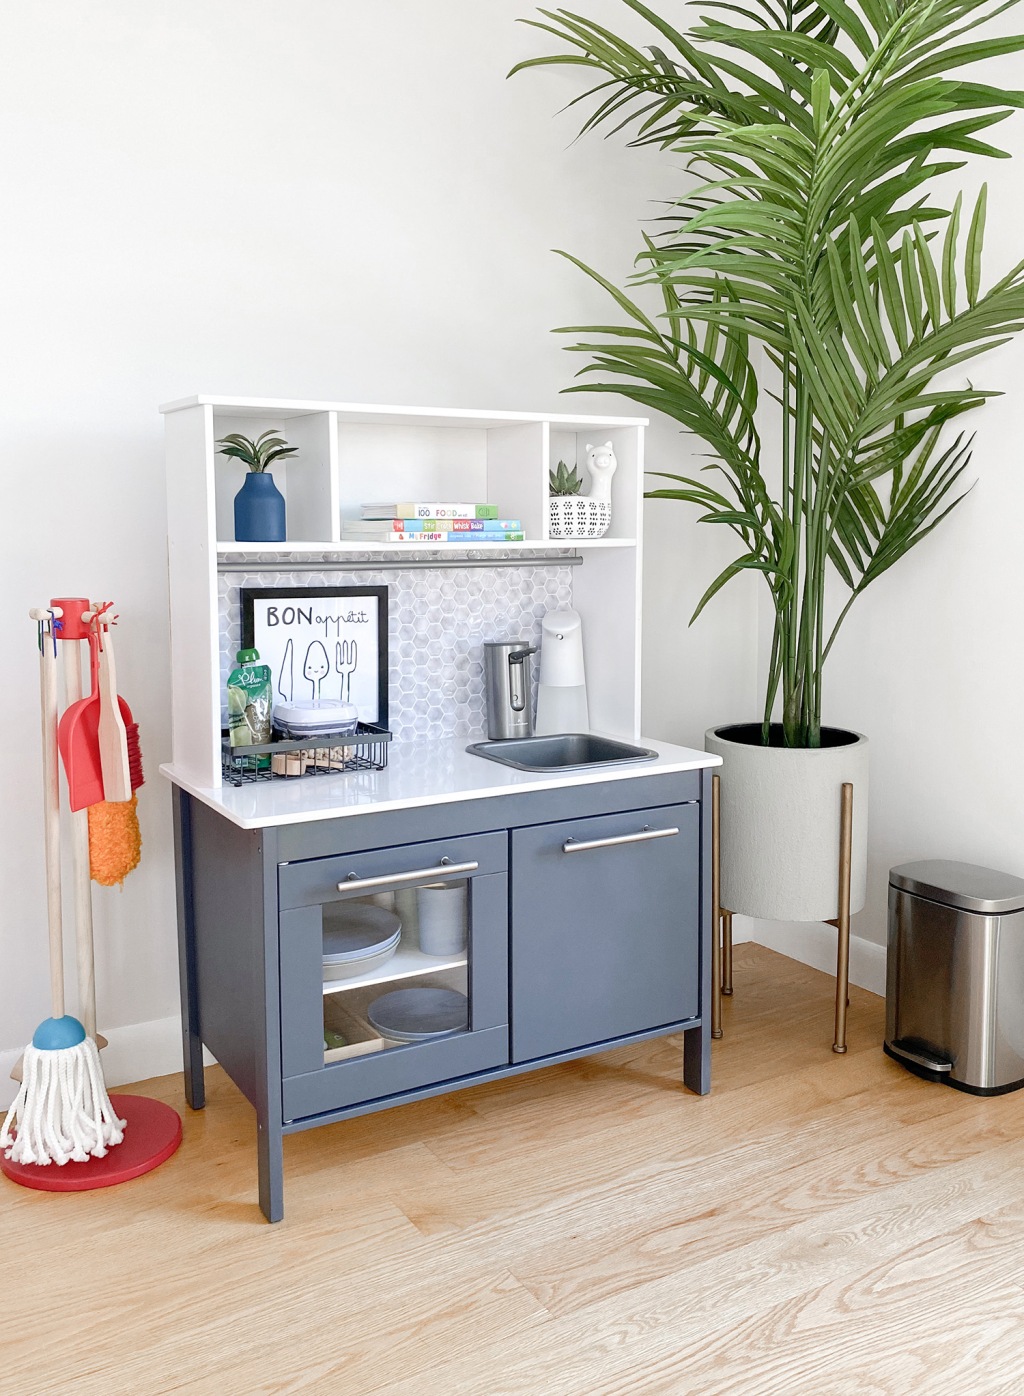
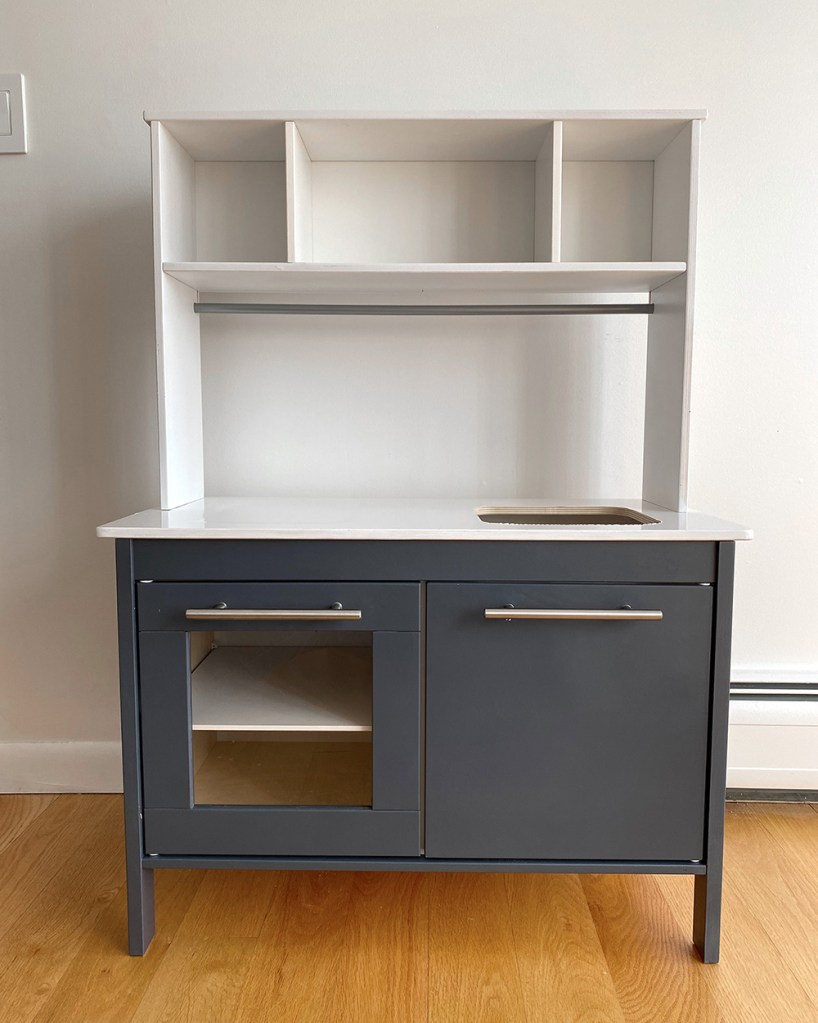
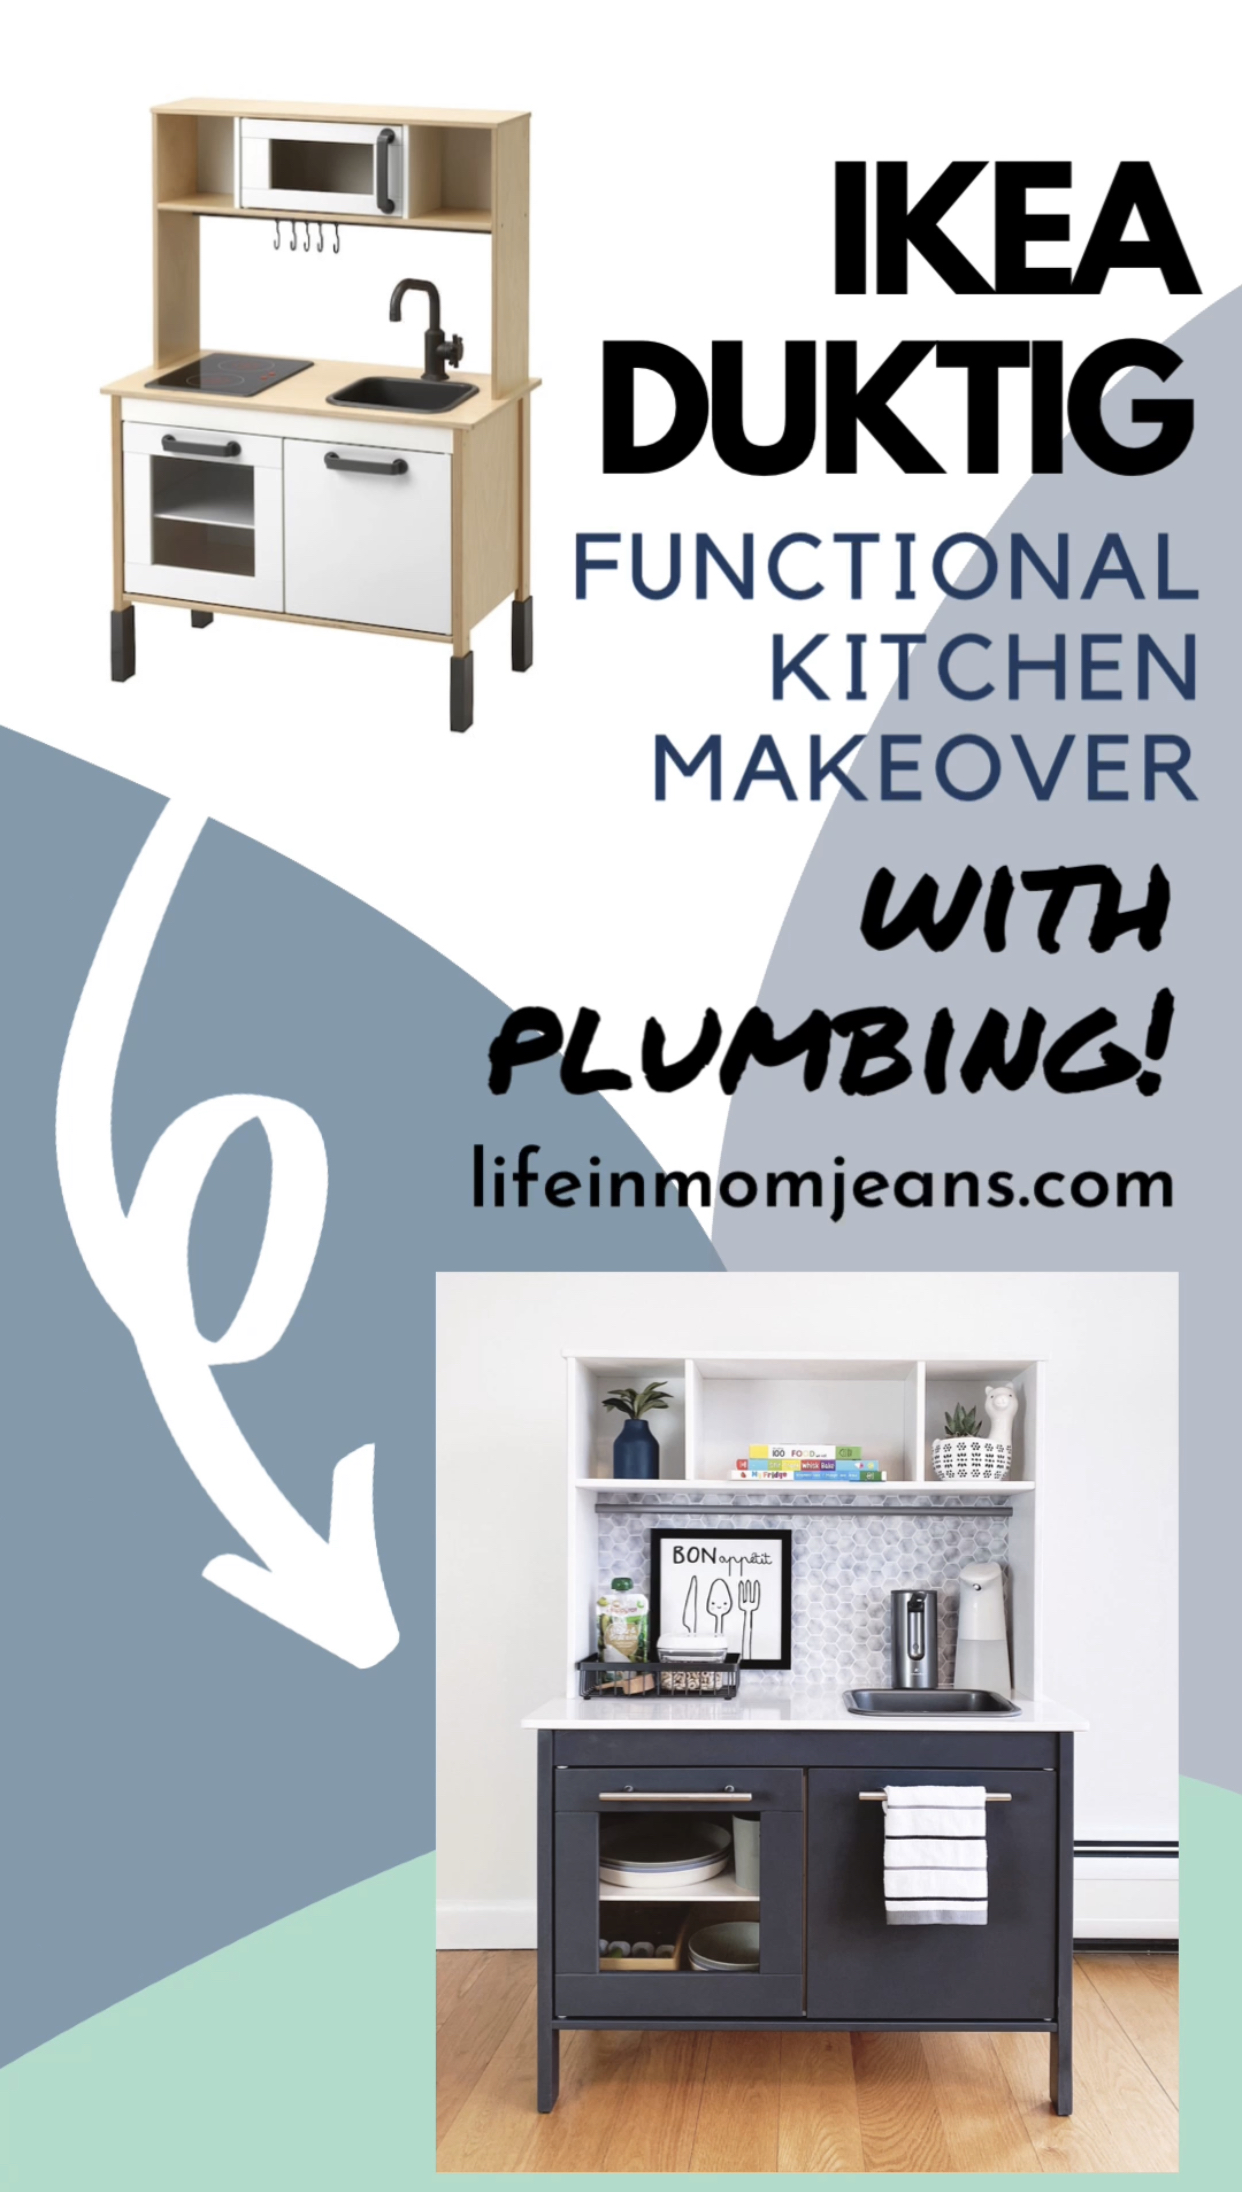
When I was looking to convert a play kitchen into a functional kitchen for my son, I found tons of Ikea Duktig makeovers that were beautiful and included a working sink. However, most of the makeovers that I found involved using two bins for water on the shelves underneath the sink. I didn’t love this idea because: (1) they weight of the water made the shelves bow; (2) I knew that my son would just splash and dump the water out if he could reach it.; and (3) I wanted to keep those shelves usable for actual storage. Therefore, I wanted to find a way to imitate a regular plumbing system that would keep the water hidden away. After lots of experimenting with different types of tubes and drains, I finally found a combination that I found works for the Ikea Duktig play kitchen! The only thing to note was: because the water sources are in the back, the cabinet sticks out from the wall a bit.
If you’re looking to take on a similar project, don’t be intimidated by the idea of creating a mock plumbing system! The most tedious part of this makeover was really just the painting. After doing it myself, I really think it was worth it to not have any accessible water underneath in the cabinet.
Materials
For Painting
- Primer, white paint, dark gray paint, polycrylic sealer, paintbrushes or rollers, painter’s tape, sander, wood filler
Decorative Details:
- Piece of MDF or thin wood
- Stick-on backsplash
- Waterproof contact paper
- Cabinet pull handles and washers
Tools:
- Power drill
- 1.5″ hole saw
- 1.75″ hole saw
- Scissors
- 3/8″ wood screws
For Plumbing:
- Short Sink Drain
- Flexible hose
- Weatherseal tape
- 2 water containers (same volume for both)
- UPDATE: NEW Automatic water pump (I recommend this one instead since it doesn’t fold down)
- Automatic water pump (old style that you see in photos)
Want to know what I put in my Montessori functional kitchen?
Check out my post: What I Put In My Montessori Functional Kitchen
The Process
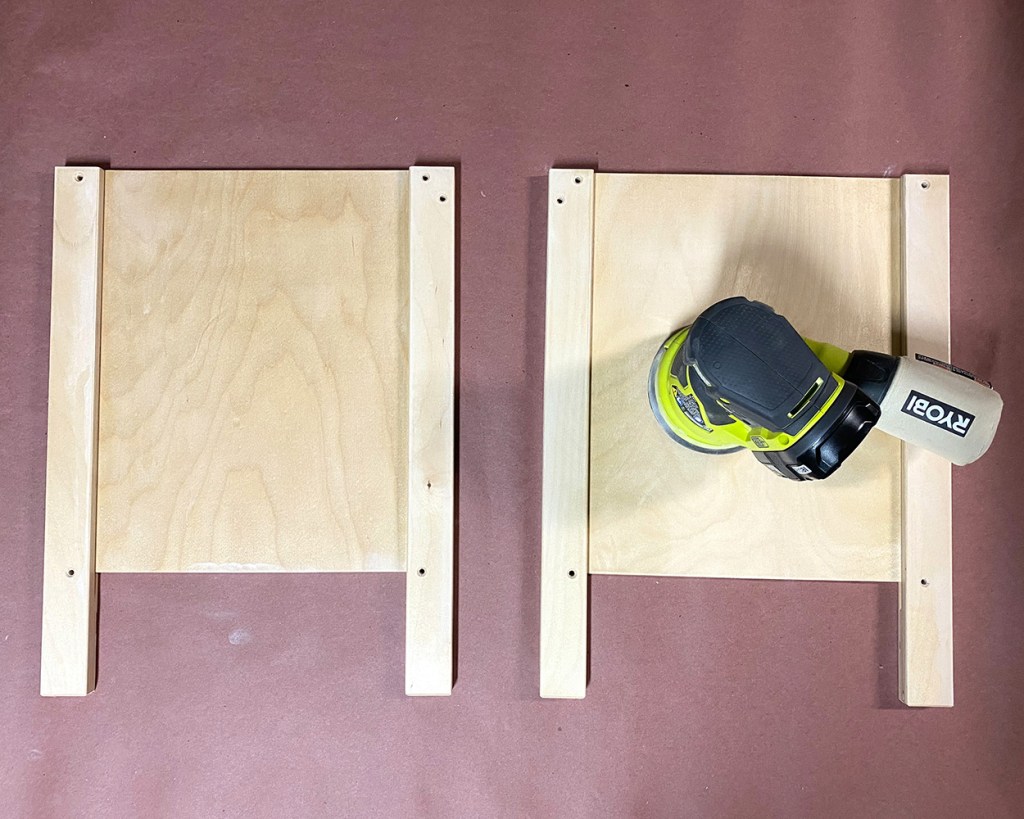
1. Preparing for Painting
First. I separated the kitchen parts into separate groups: (1) all the parts for the BASE CABINET; (2) the COUNTERTOP; (3) all the parts for the TOP SHELVING UNIT; (4) the hardware and accessories. For my design, I did NOT need: the small door for the top cabinet, the cabinet handles, the faucet, and the stove. (I kept the faucet and stove in case I want to convert it back to a play kitchen later.) Also, thought I didn’t use the cabinet legs or utensil hooks in my final project, I kept them for future use so I can adapt the cabinet as my son grows.
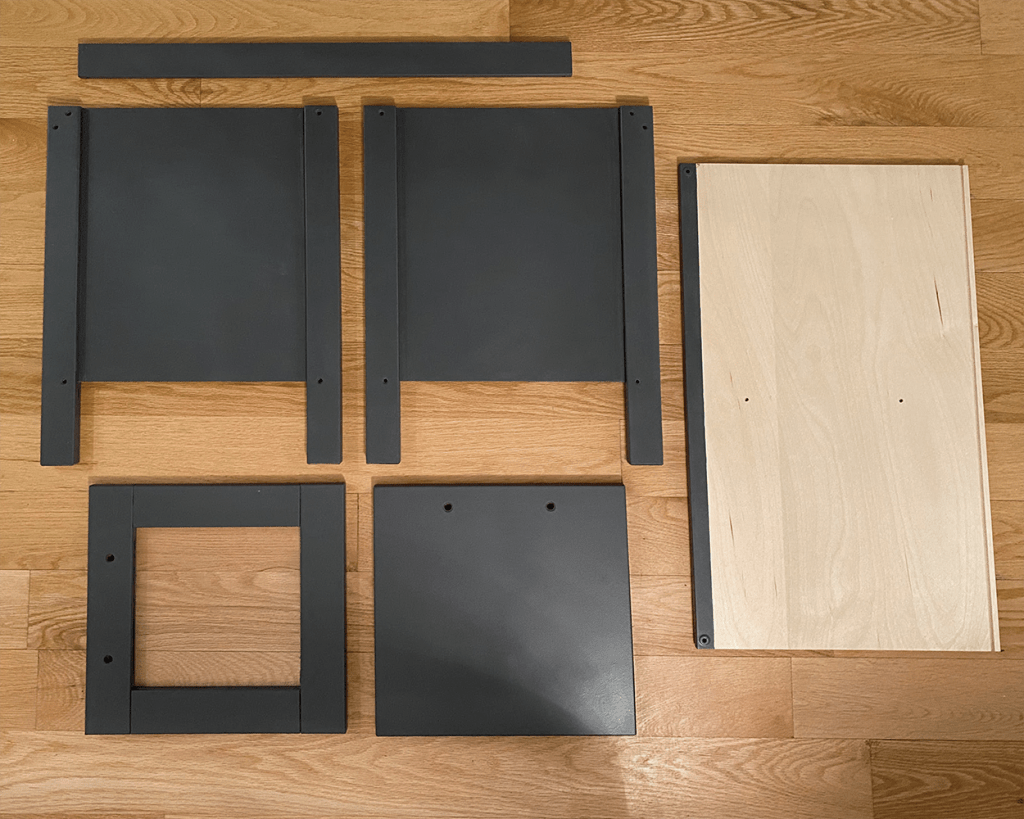
2. Base Cabinet
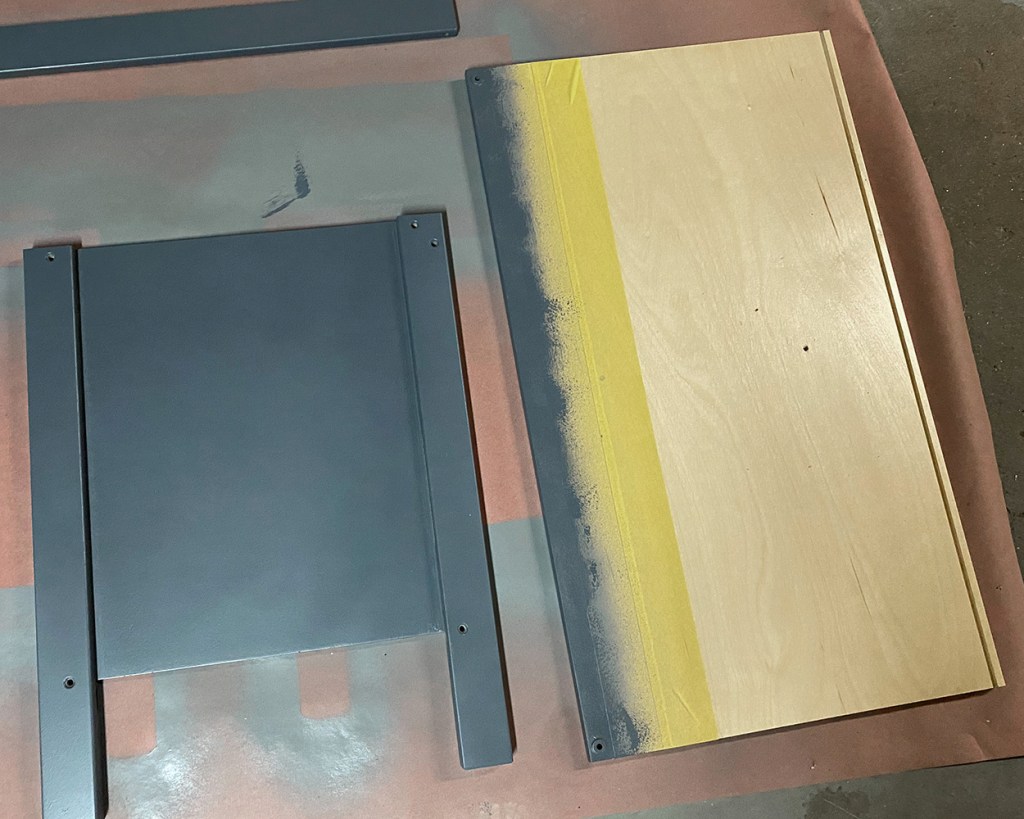
I sanded, primed, and painted all of the EXTERIOR cabinet pieces, which included the two sides (front and back), the doors (front and back), the front top bar, and the bottom base piece. For the bottom piece, however, I only payined the very front strip where the doors would sit, which I did by sectioning off that strip with some painter’s tape. I chose to do it this way because I didn’t want my son’s food items to sit on any painted surfaces, so I left all of the interior natural. **Important: After painting, I sealed all of the paint with polycrylic to prevent chipping (considering how much toddler abuse it’s going to get!)
- For the base cabinet, I used a Behr Ultra eggshell paint in the color Pencilpoint.

Once painted and sealed, the I assembled the base cabinet. I left the right door off for now (so I wouldn’t have to remove it again later when I work on the plumbing). For my project, I left the cabinet legs off because my son is still very small.
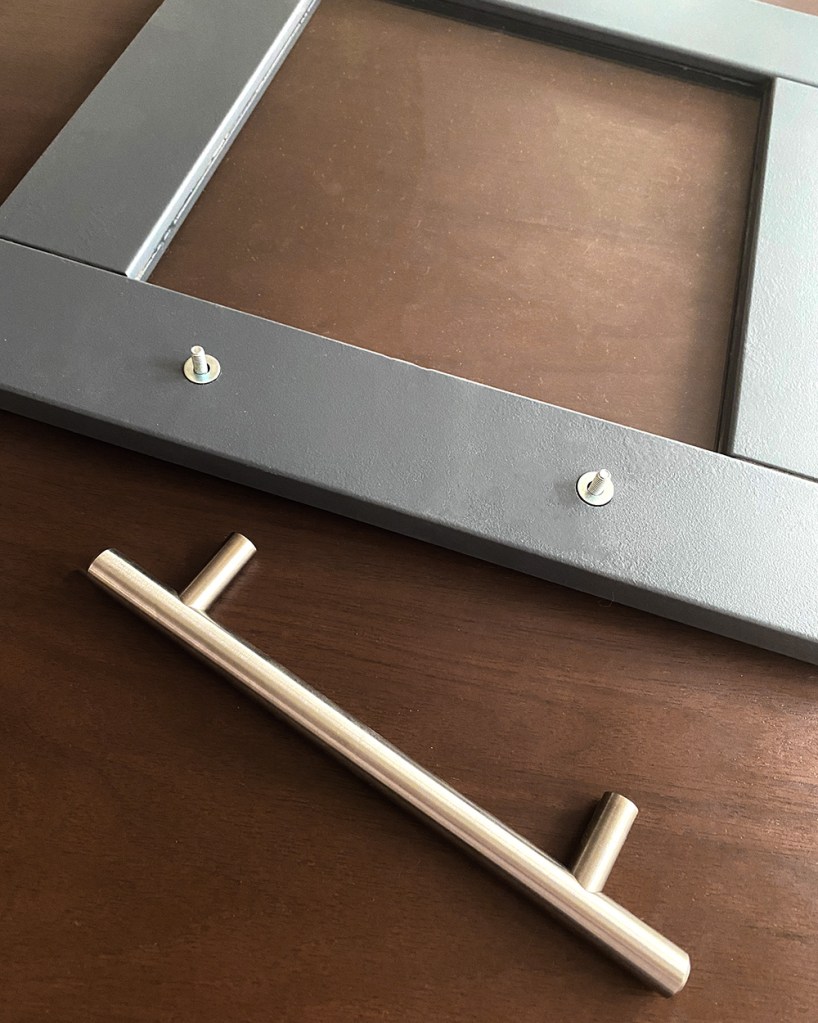
For the cabinet doors, I used a modern door handle instead of the plastic ones that came with the set. These handles matched the ones I have in my own kitchen and fit perfectly into the pre-drilled holes. However, because the holes were recessed into the wood, I had to use a washer to push them forward.
3. Countertop
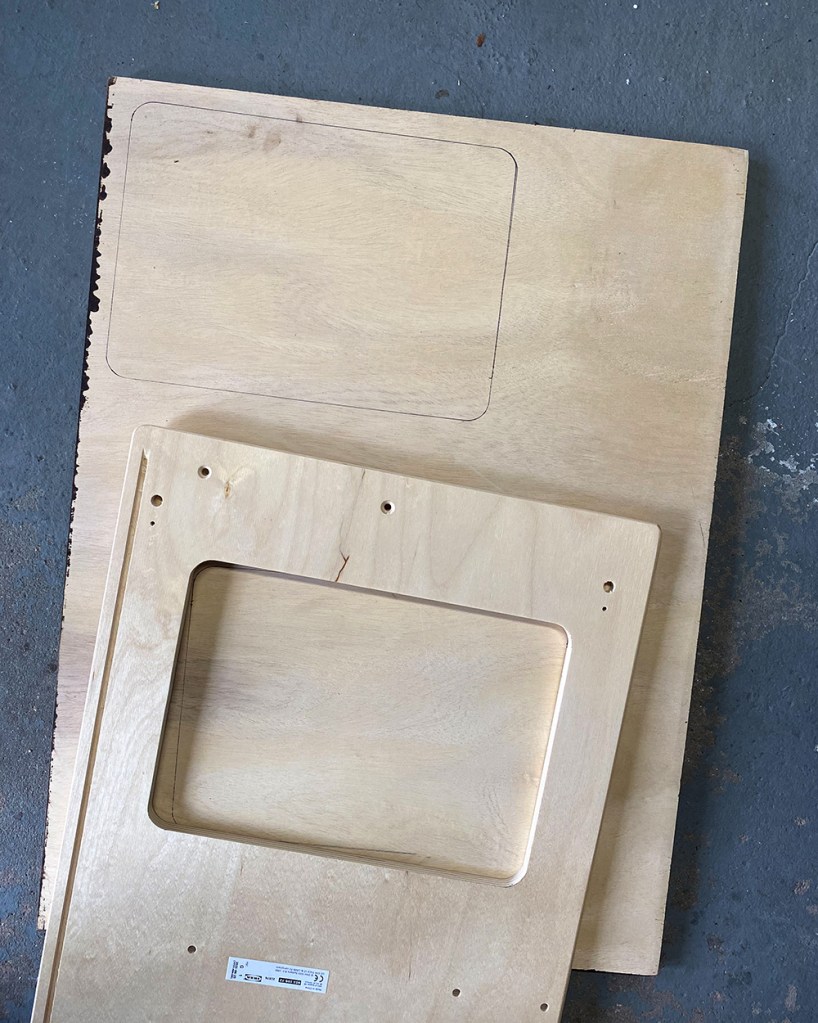
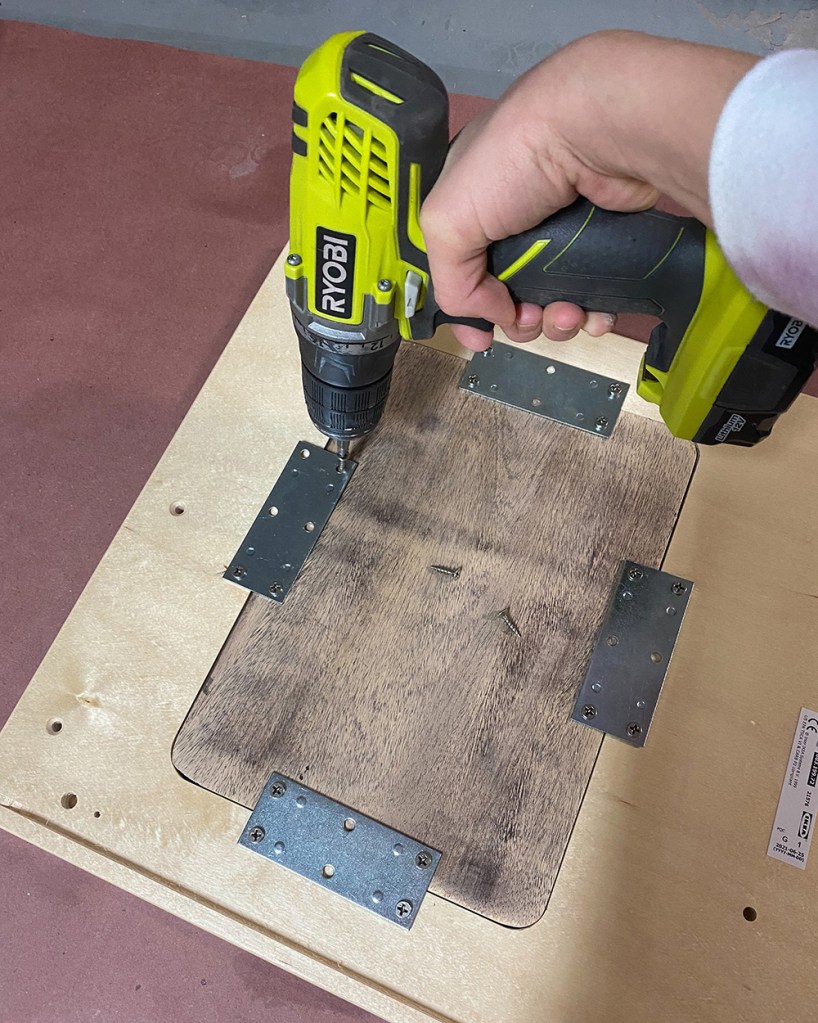
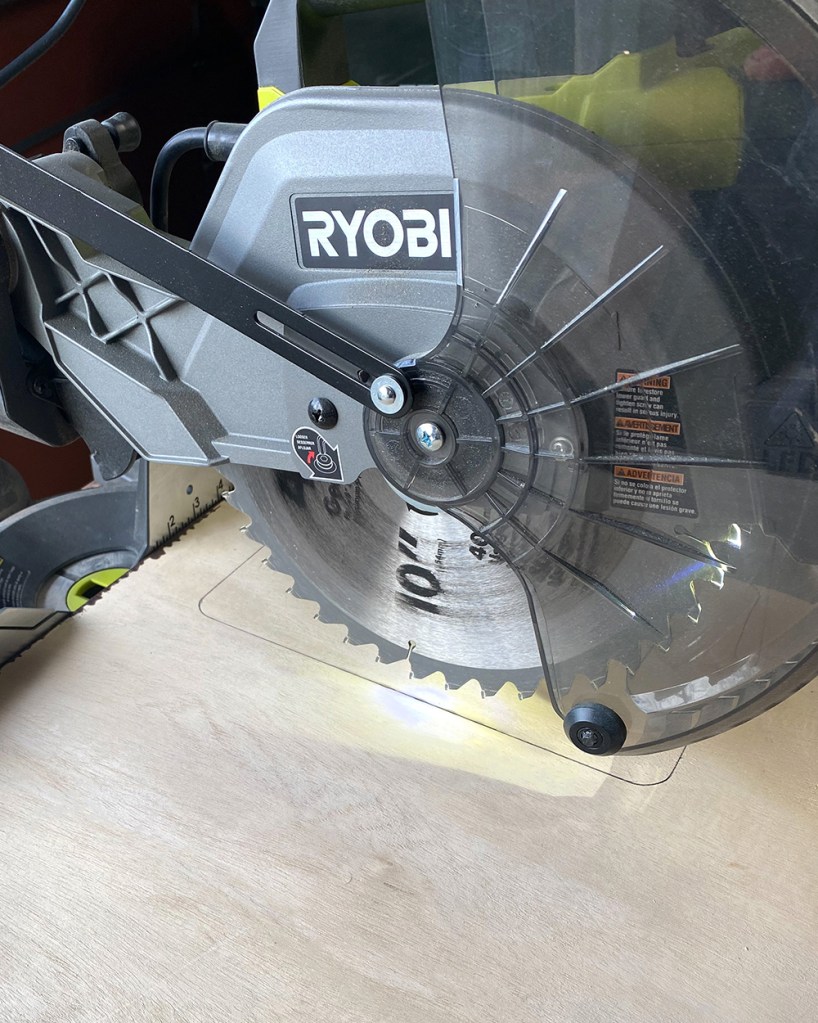
The Duktig kitchen countertop has two large cutouts: one for the sink and one for the stove. Since I didn’t intend to use the fake stove, I wanted to create a usable surface for my son on the countertop. On other makeovers that I’ve seen, people just put a cutting board over the stove cutout, but I chose to patch it up permanently to make it more versatile and keep things from falling through. To do this, I traced the shape of the hole onto a 1/2″ piece of scrap plywood, cut out the shape, and screwed it to the countertop with some brackets (I just made sure to line it up flush with the top of the countertop as best as I could). Once attached, I filled in the gaps around the wood piece with some wood filler, sanded it smooth, and sealed with a little polycrylic to prevent the wood filler from flaking. The countertop was then ready to be installed onto the base cabinet.

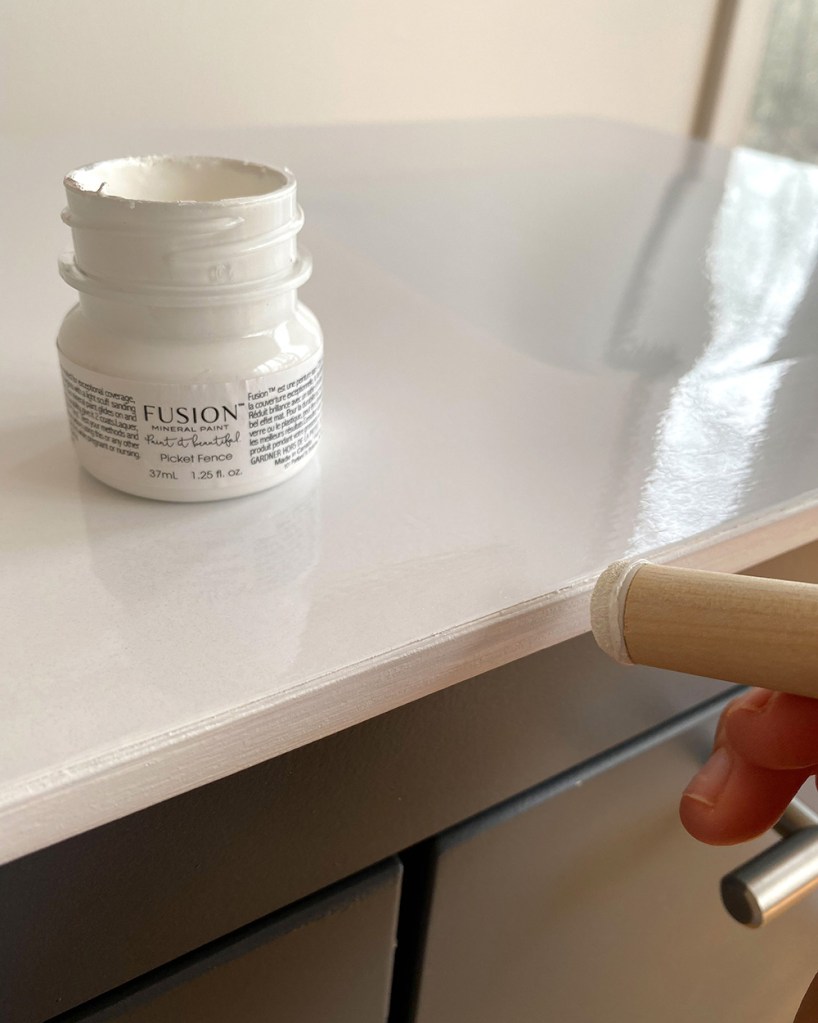
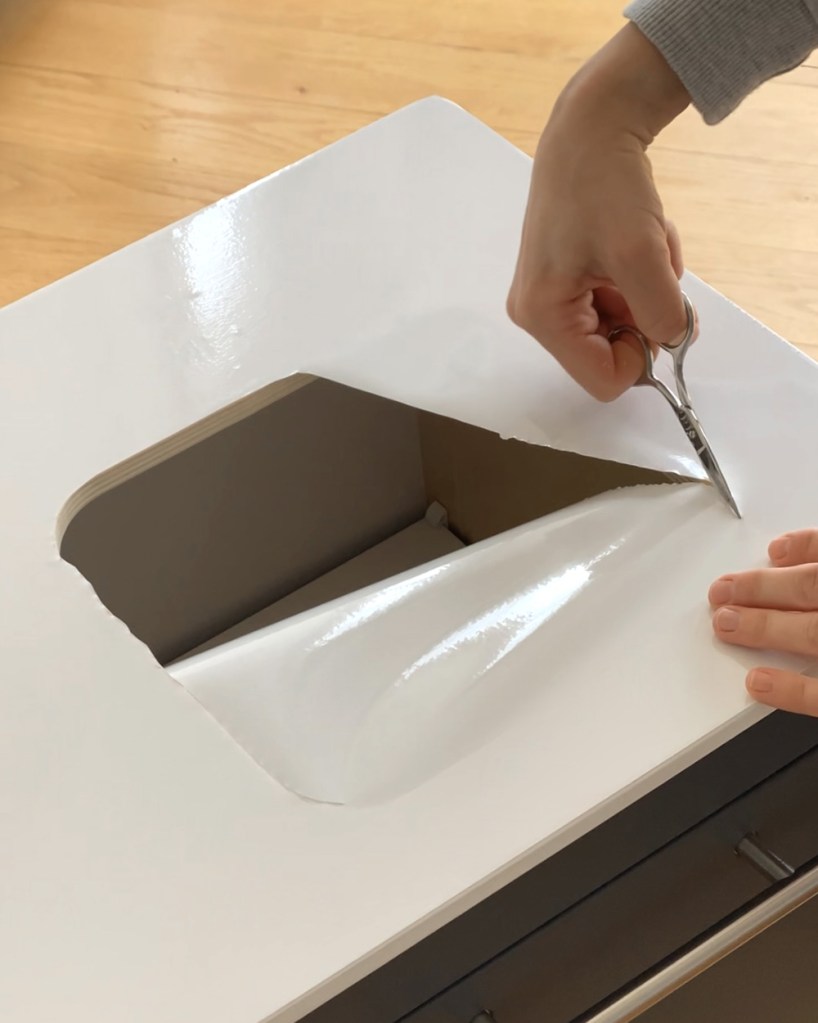
For the countertop, I used a white, waterproof contact paper. To attach it, I first cut it to the approximate size that I needed. I peeled off the paper liner and used a felt squeegee to smooth out air bubbles as I laid the contact paper down. I only applied the contact paper to the top of the countertop–rather than folding it down over the sides–since the corners of the countertop are rounded. (I didn’t want any awkward folded corners.) I trimmed off the excess contact paper around the edges and used white mineral paint to cover up the edge of the wood. Lastly, I cut out the hole for the sink with scissors.

4. Upper Shelving Unit
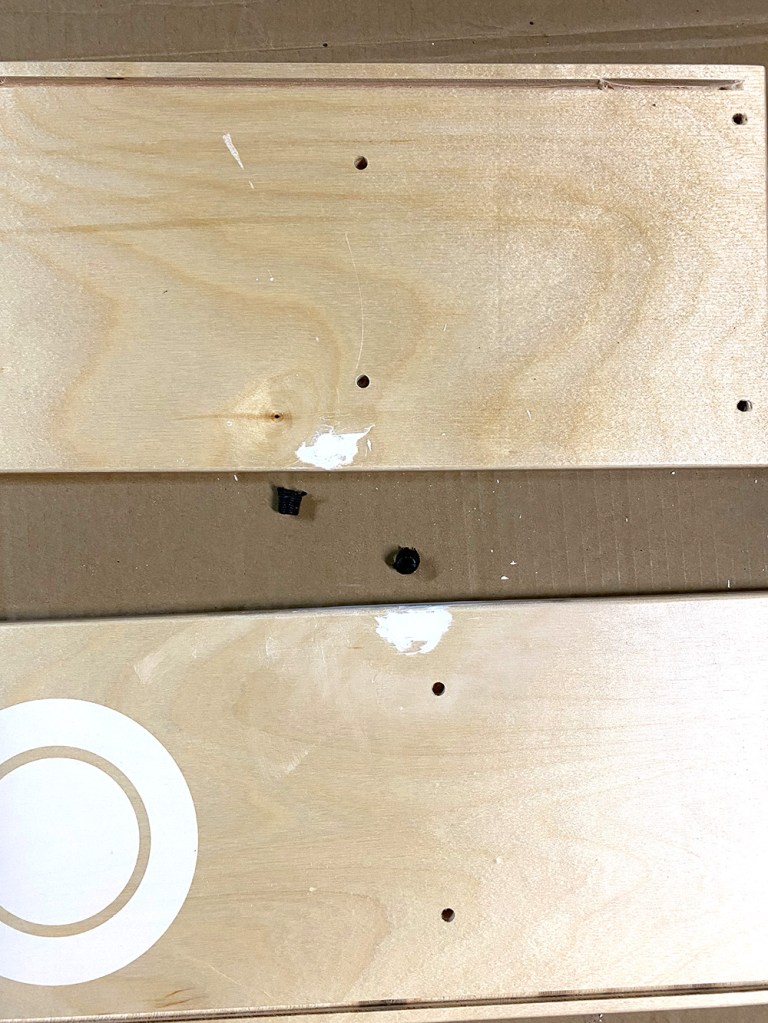
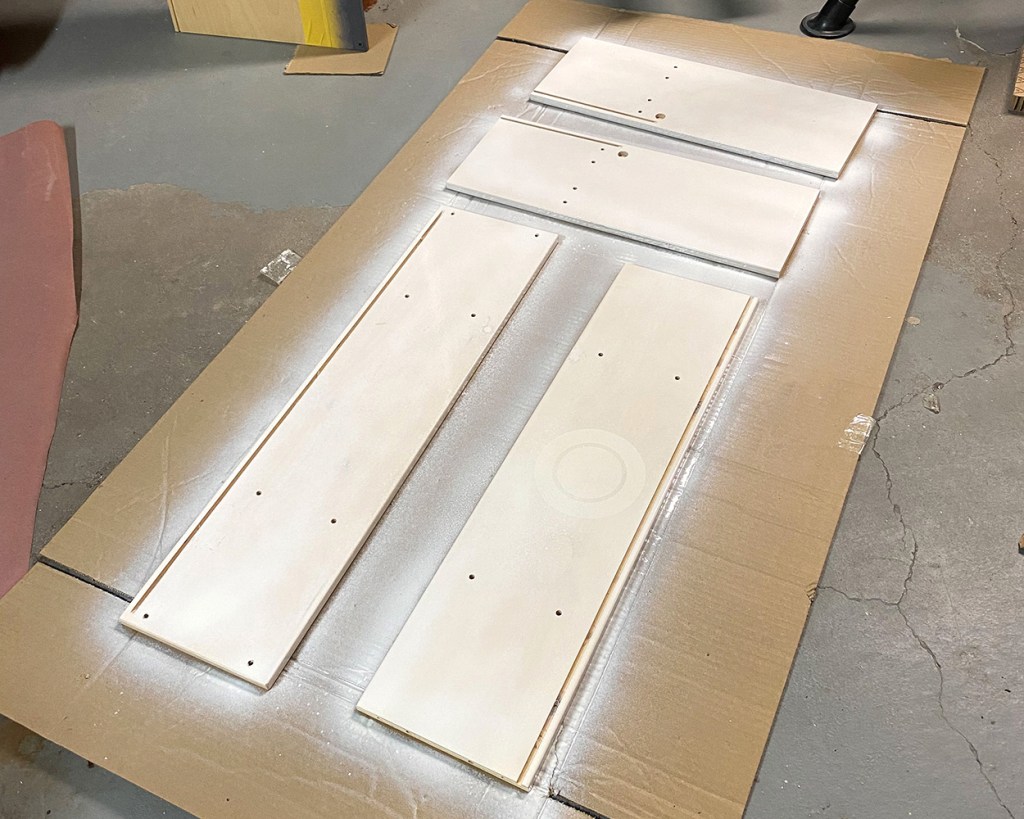
I sanded, primed, and sealed all pieces (front and back) of the upper shelving unit, which included the two sides, and the top and bottom shelves. The inner dividers already came white. Since I chose not to use the fake microwave door, I pried out the two black circle hinges from the shelves (Note: this was very difficult and required extreme care to not split the wood). I filled all the holes with wood filler prior to painting.
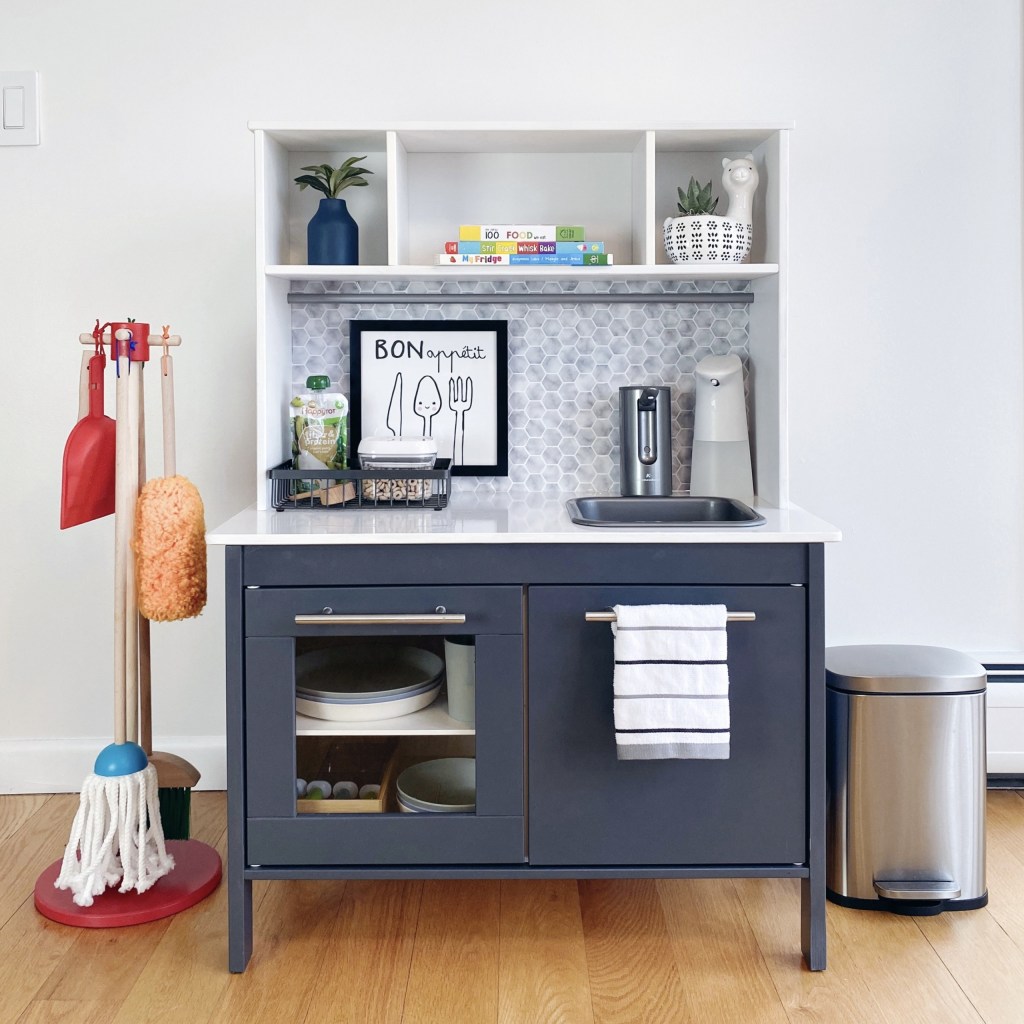
Once painted and sealed, I assembled the upper shelving unit and attached it to the countertop. I chose to include the gray bar that came with the kitchen so that I could use it for hanging things in the future, but I know that some people leave this off. However, it’s worth noting that once the unit is assembled with or without the bar, it cannot be added or removed later without disassembling the whole unit.
- For the upper shelving unit, I used a Rustoleum satin spray paint in White.
5. Adding the Backsplash
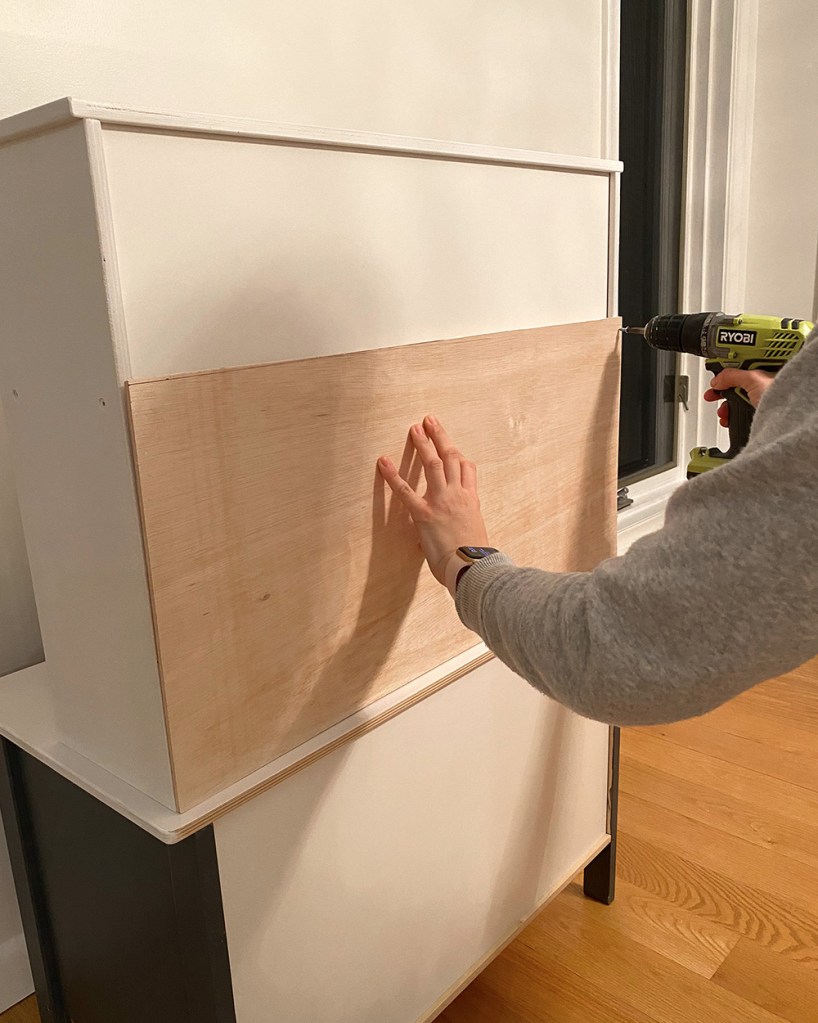
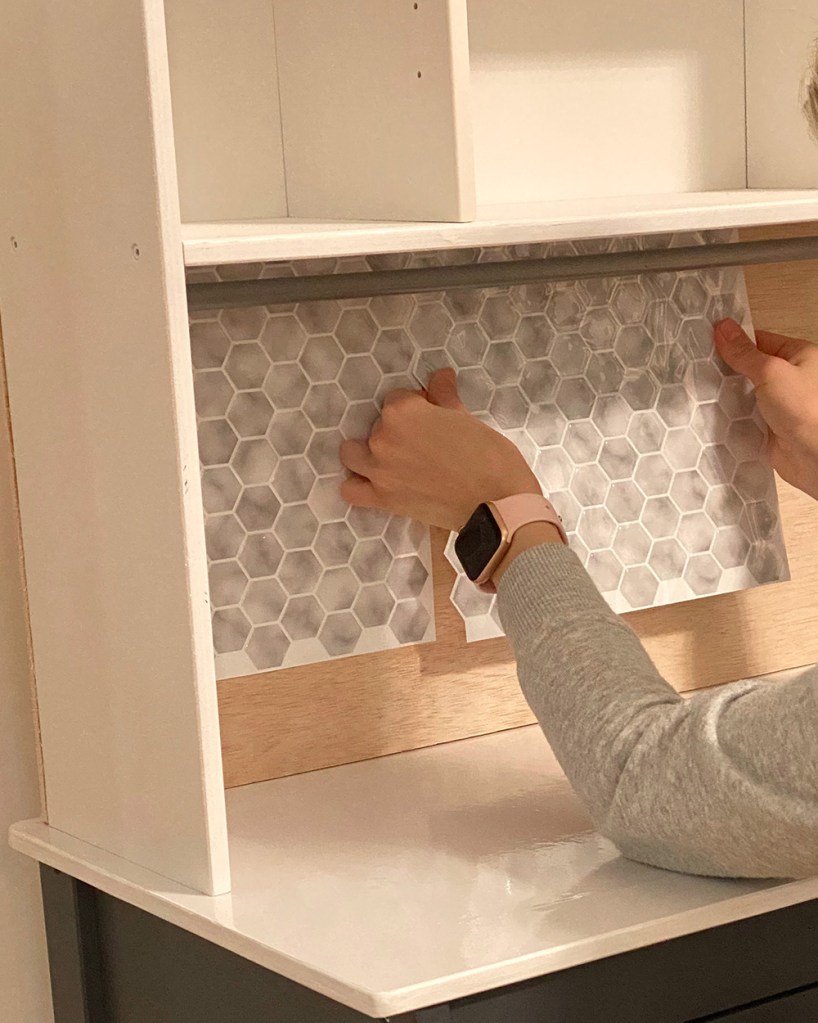
To create a backsplash, I measured the open space on the upper unit and cut an appropriate piece of MDF board. I attached the MDF to the back of the kitchen with some screws before adding the backsplash. (However, I realized afterwards that it actually would have been easier to do the backsplash BEFORE attaching the wood.) I simply measured and cut the stick-on backsplash sheets so that the pattern overlapped itself and covered the whole piece of wood.
6. Time for the Plumbing
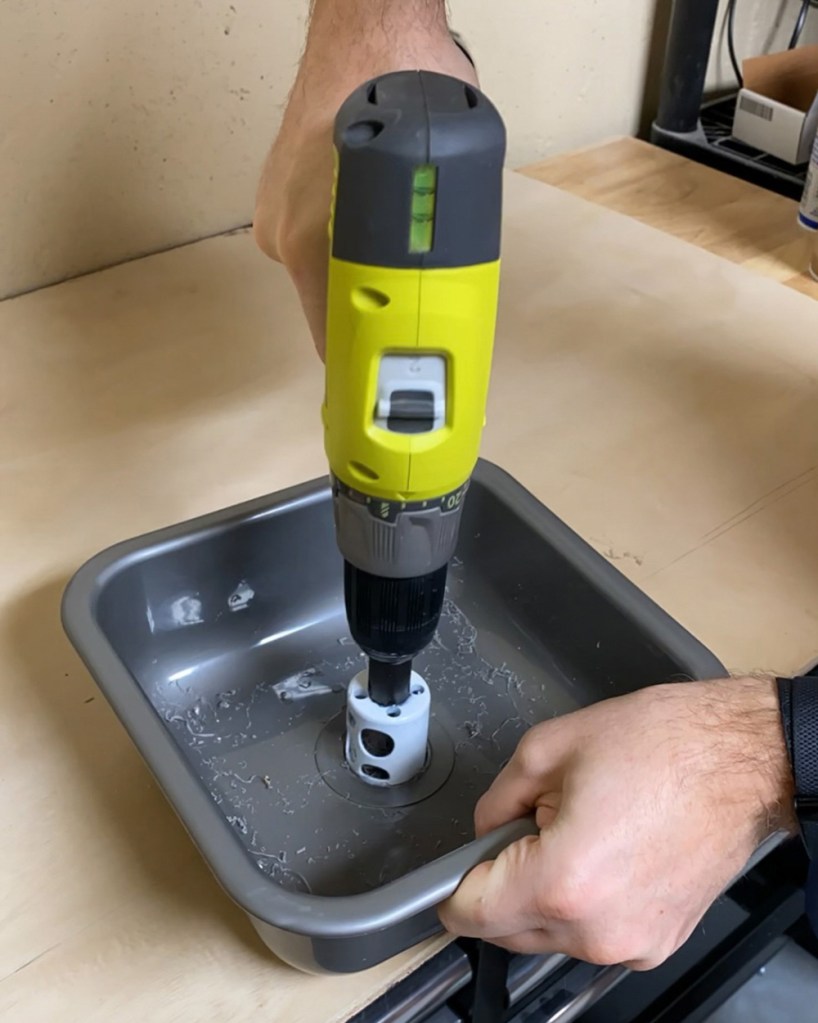
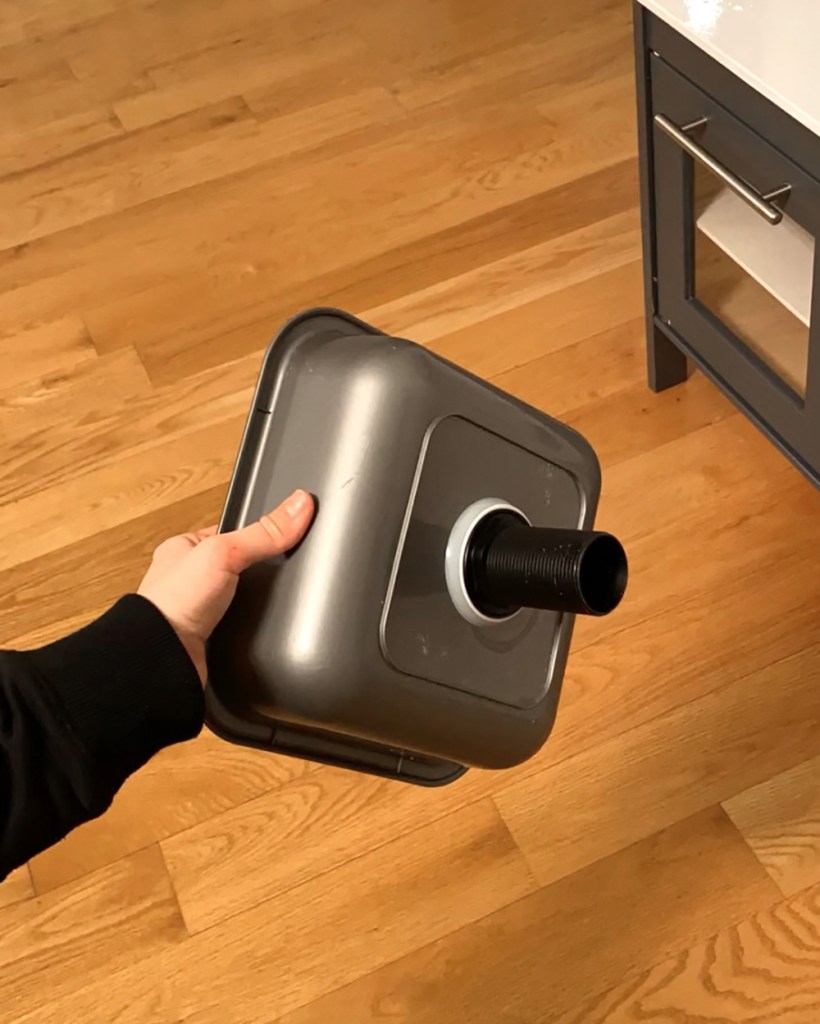
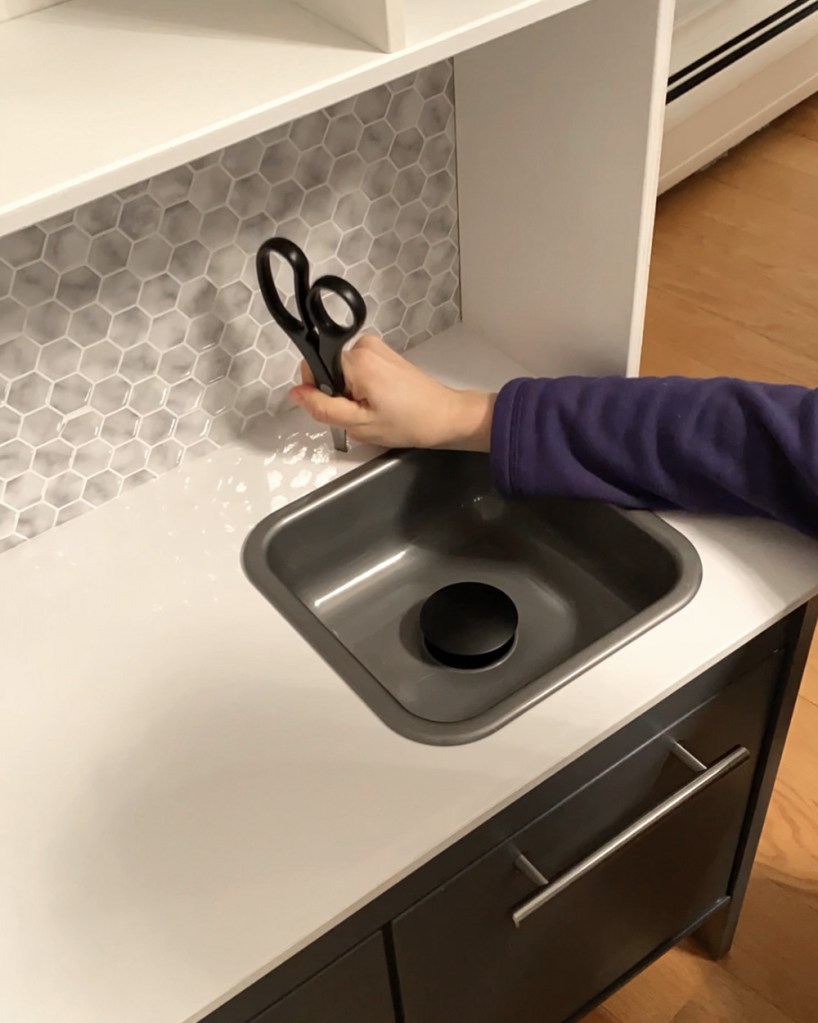
To install the drain, I used a 1.5″ hole saw to cut a hole in the sink. I cut out the hole in the center of the sink, then filed off any extra pieces of plastic to make sure that the drain sat nice and flat in the sink. Since it was a tight fit (and it’s not a real sink), I just pushed the drain in WITHOUT the top rubber gasket. I did use the bottom gasket and screwed it on tightly. I considered caulking around the drain, but I didn’t find it to be necessary since the drain was in so tightly.
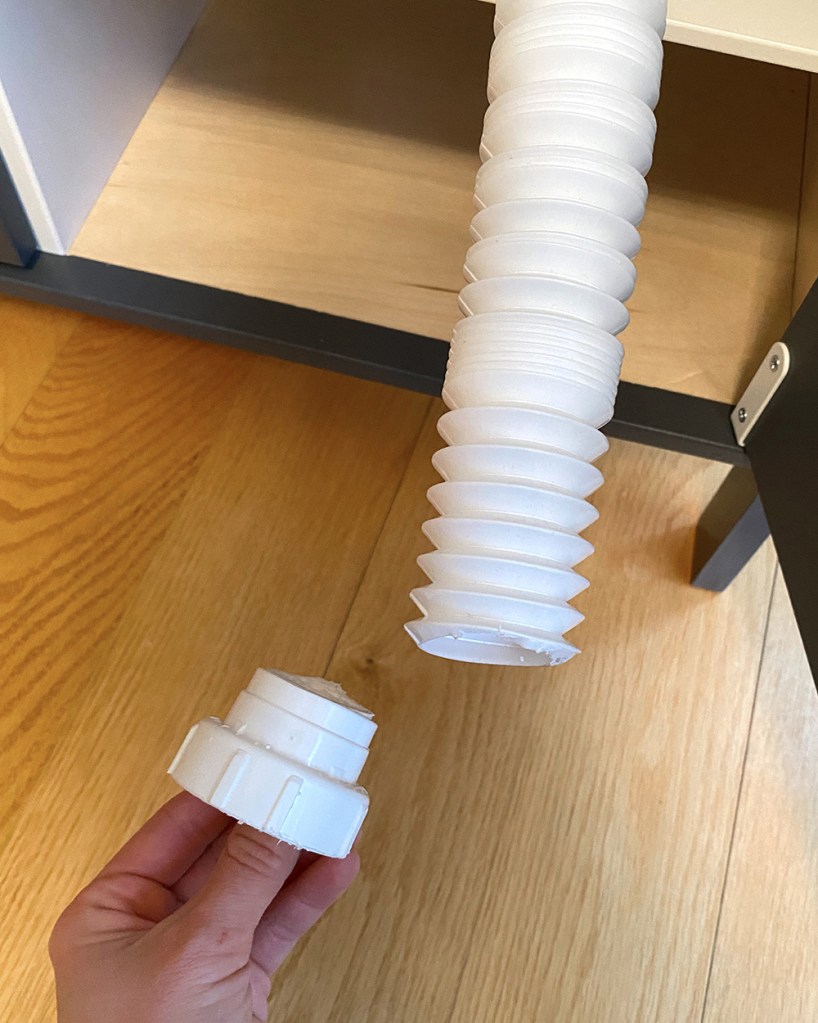
Then, I attached a flexible hose to the drain with the 1.5″ adapter as tightly as I could. I cut off the connector at the other end of the hose so that it would fit through your cabinet,
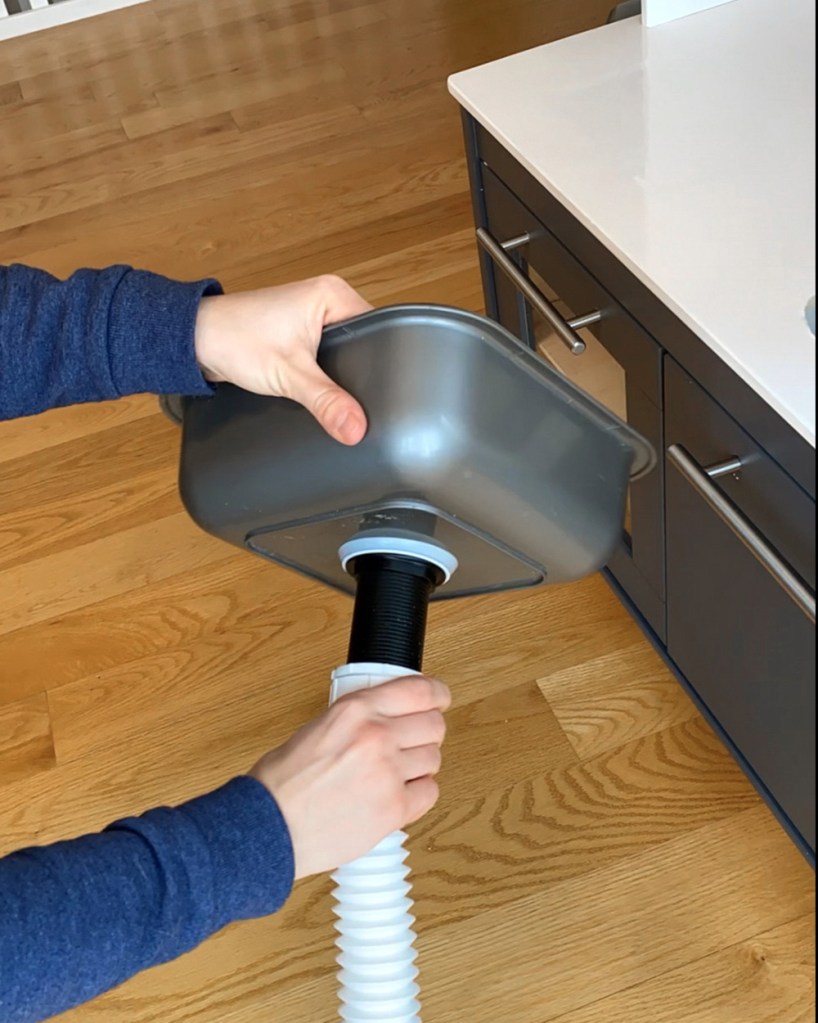
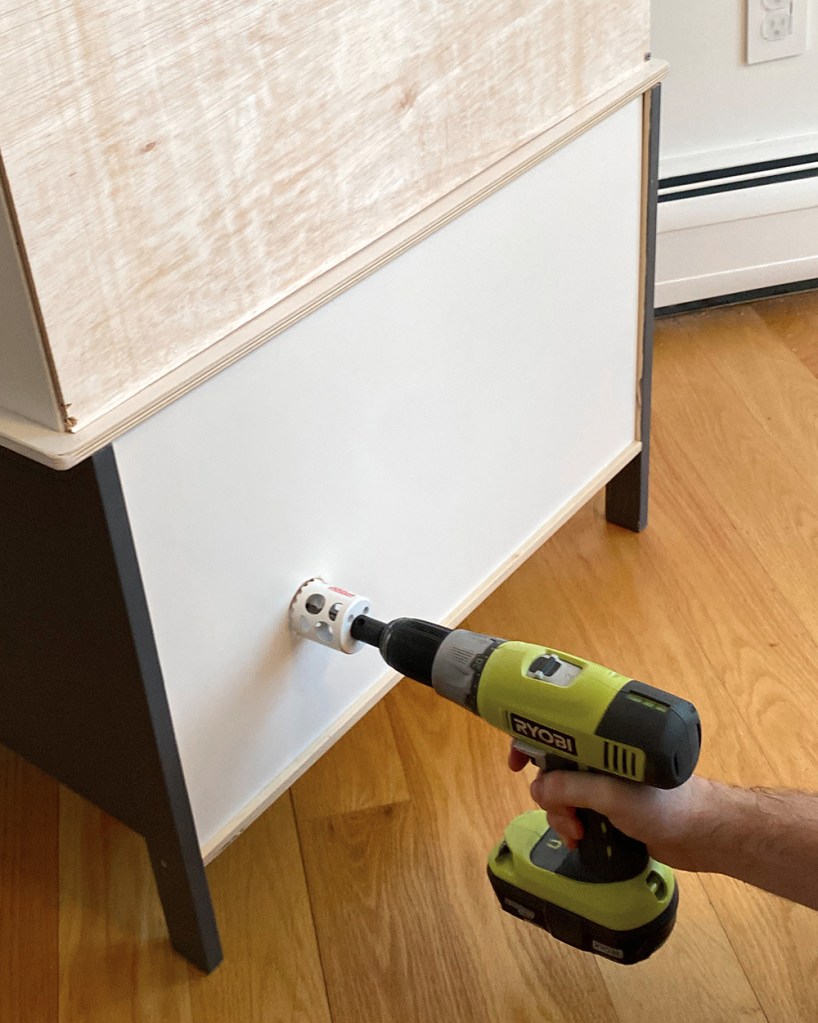
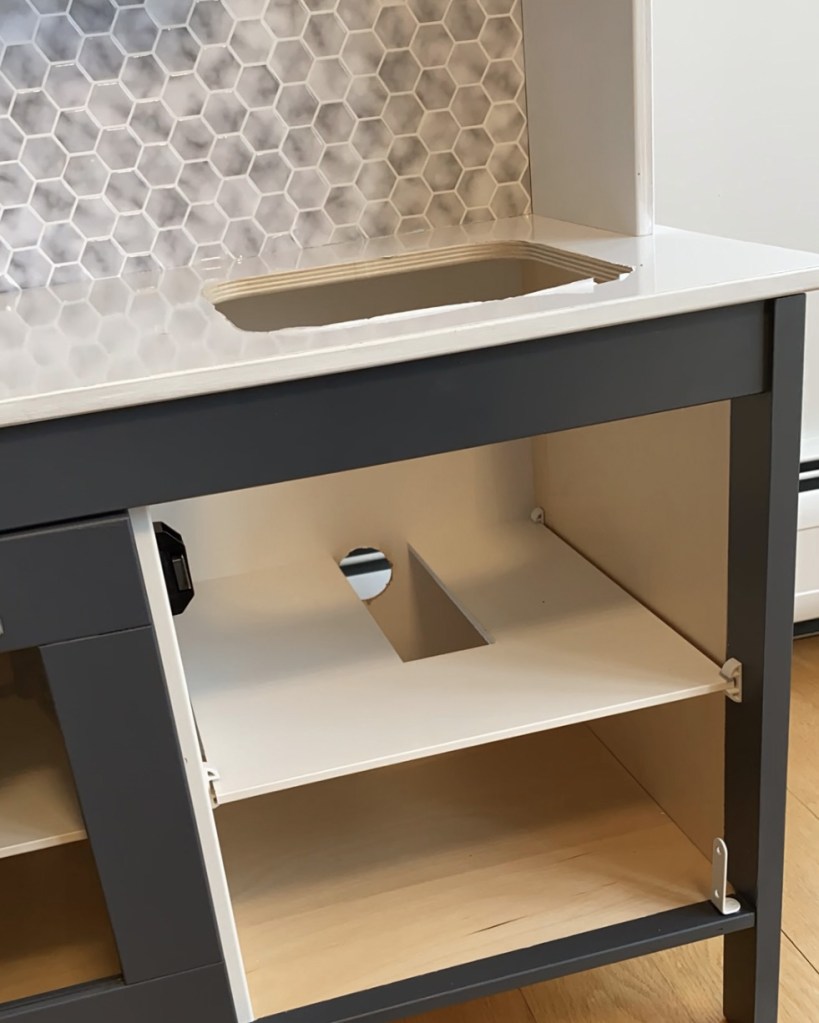
Using a 1.75″ hole saw, I drilled a hole through the back of the cabinet where the drain hose would go. I positioned this hole so that the hose sat at a slight downward angle, which meant that I had to cut out a section of the shelf. I could have removed this shelf entirely, but I wanted to have the extra shelf space so I just chose to cut out the piece.
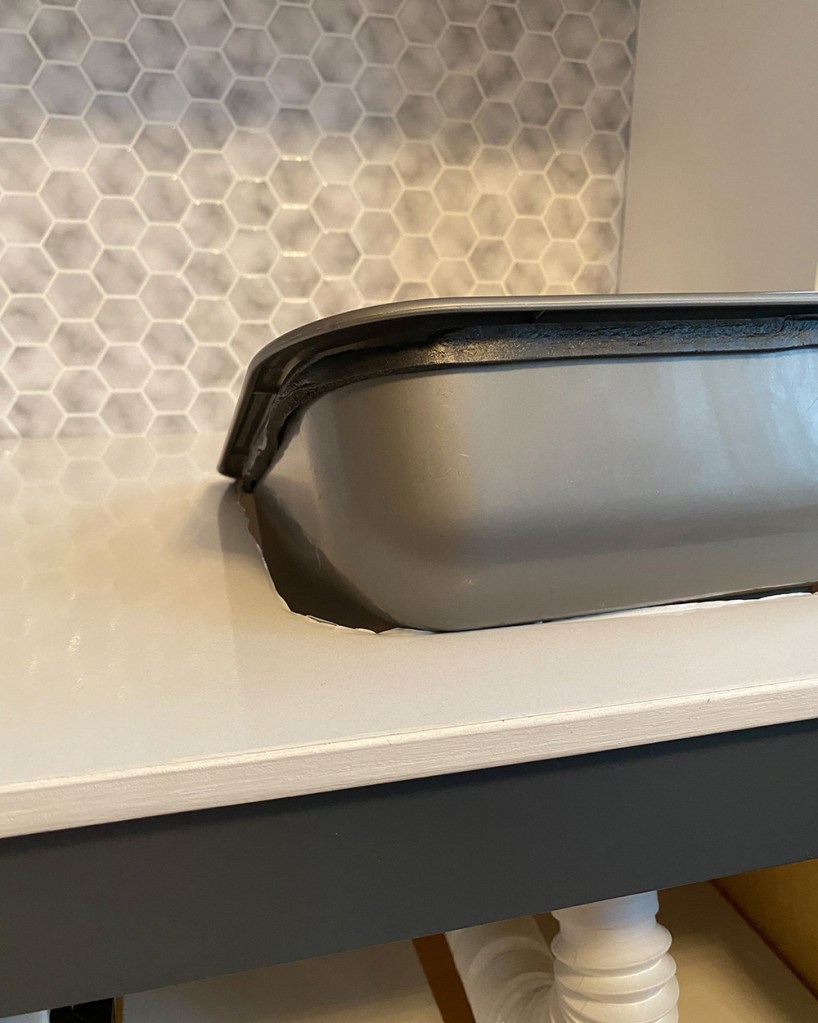
Before placing the sink into the cabinet, I added a weatherproof strip to secure the sink in place and keep water from leaking underneath. Another option would have been to permanently attach the sink to the countertop, but I wanted the ability to remove the sink for deep cleaning or in case the contact paper ever needed replacing. (When inserting the sink into the countertop, I found that only doing it once and leaving it there was best. When I tried to take it back out once, the weatherstripping needed to be replaced.) Once the sink was securely in place, I fed the drain hose through the hole to the back of the cabinet.


Finally, it was time to add the faucet.
UPDATE! I originally chose this automatic pump (which you see in the photos) because it has different volume settings so you can choose how much water you want to come out. I liked it, except for the fact that the spout folded down so my toddler was constantly closing it while the water was running and splashing water everywhere. Instead, I switched to this automatic water pump, which also allows for different settings but does not fold down. I actually like it much better!

Under the contact paper, I found the two precut holes in the countertop that were intended for the fake faucet. For my automatic pump, I poked a hole in the contact paper through the FRONT hole (closest to the sink). Then I fed the pump tube through the hole. Lastly, I drilled a small hole (just slightly bigger than the tube) in the back of the cabinet and fed the tube through the hole. I had to cut off the little plastic end on the tube for it to fit.


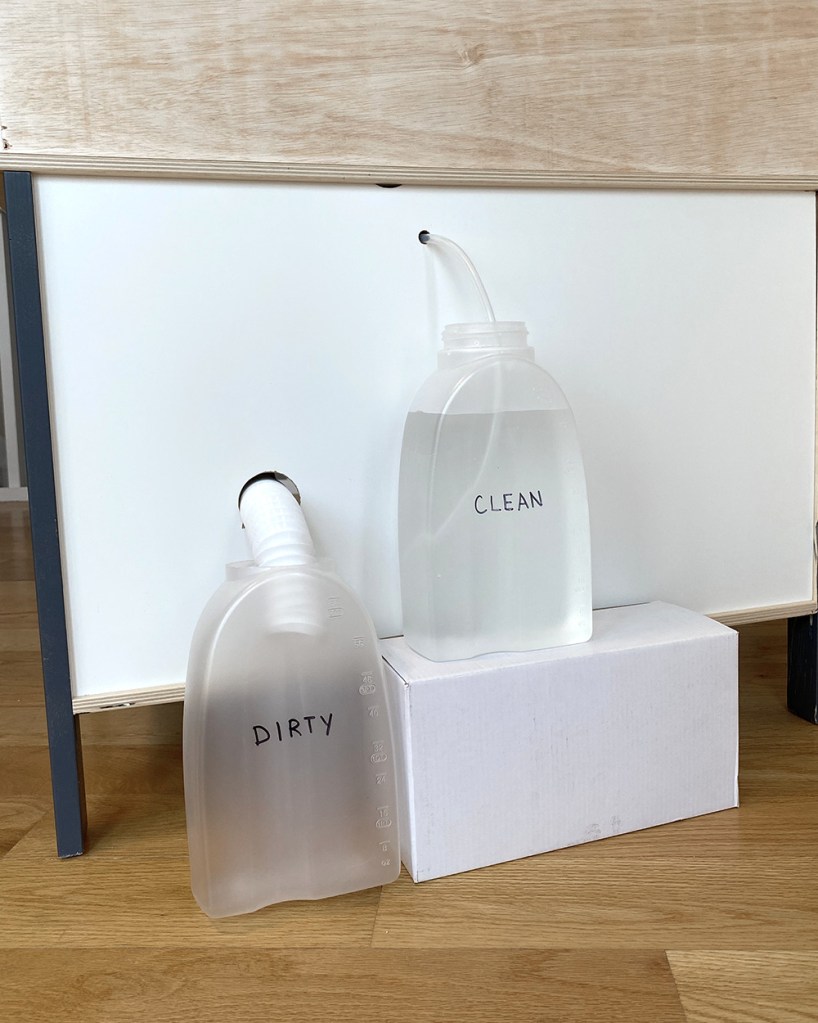
7. Attaching the Water Supply
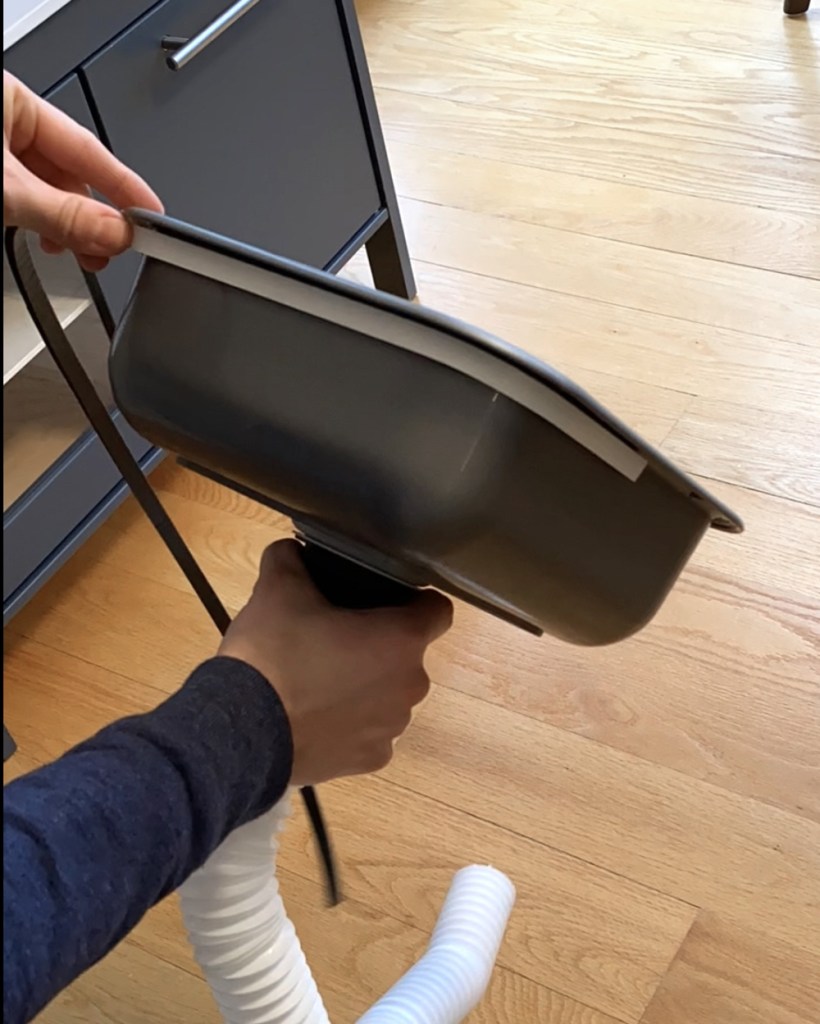
Last but not least, it was time to set the water containers in place. When choosing my containers, I opted for 2 quart containers because I wanted something light that would be easy to clean and change frequently. Since the hose for the drain had to be set low, I cut the top off of the container for a better fit. On the other hand, since the hose of the water pump was higher up (and it needed to reach the bottom of the container), I simply raised the container up on a box. And that’s it!


Leave a comment